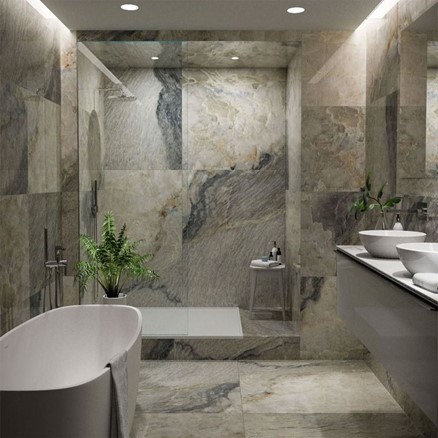
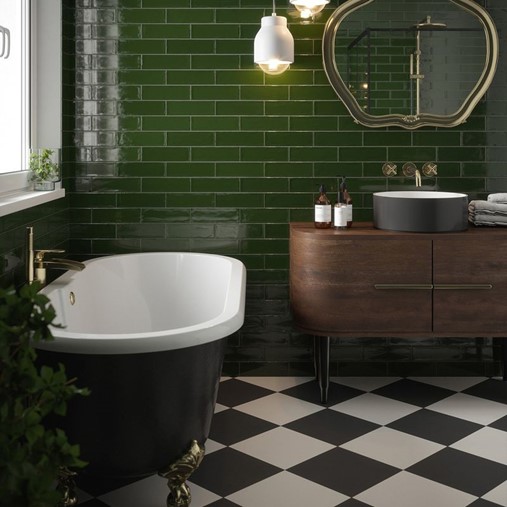
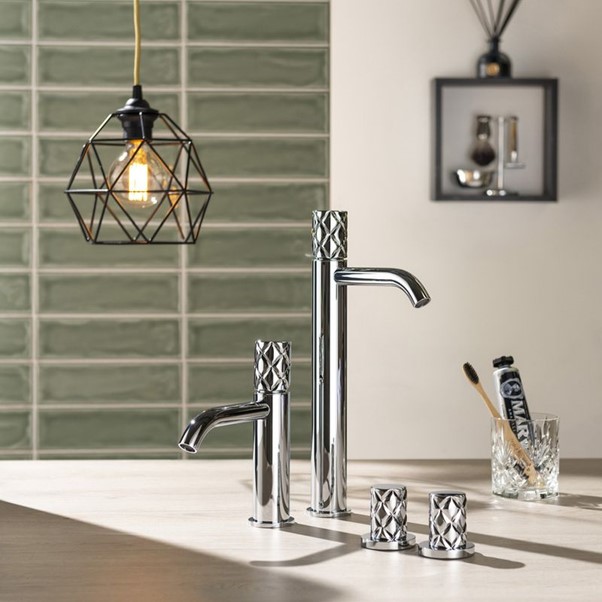
Let’s set the scene. You’ve just stepped into your dream bathroom, adorned with the elegance of your newly installed tiles. The sunlight dances off their pristine surfaces, casting a warm and inviting glow. Each tile tells a story of your carefully chosen design, a perfect blend of style and sophistication that has transformed your bathroom into a soothing, secluded sanctuary, perfect for unwinding and relaxing. Bliss. (Obviously, tiles aren’t limited to bathrooms… they can add a splash of colour to any room, but you get the gist!)
We’re sure that the last thing you want to think about is cleaning your new tiles after the installation process is all done and dusted. You’re probably kicking and screaming, reluctant to burst the bubble of tranquillity. But life goes on, and the daily hustle and bustle must return at some point.
When you slip back into reality, you might be worried your tiles will lose their lustre. But thankfully, with this ultimate tile aftercare guide, you can ensure your tiles will remain as beautiful as the day they were laid. With the following tips, tricks and advice on tile maintenance, you’ll be empowered to keep your tiles looking as good as new.
Without further ado, let’s delve into taking care of your tiles, from how to stop water marks on tiles to cleaning your bathroom, tackling stains, and even how to make your floor or wall tiles shiny. We’ll cover everything you need to know!
Table of contents
- Should tiles be sealed after installation?
- What to avoid when cleaning your tiles
- How to clean porcelain tiles
- How to remove stains from porcelain tiles
- What is the best cleaning solution for ceramic tile floors?
- How to clean ceramic tiles
- How to clean glass tiles
- How to clean unglazed quarry tiles
- How to clean grout
- Cleaning bathroom tiles
- Cleaning kitchen tiles
- Final thoughts
Should tiles be sealed after installation?
Sealing your tiles is a crucial step in ensuring their longevity and maintaining their original charm. Tile sealant will provide a protective surface against UV exposure, wear and tear, water infiltration, staining and discolouration. Not all tiles require sealing, but the location, water exposure and porosity, not to mention the grout you select, will play a factor.
Remember, sealing is not a one-size-fits-all solution. Different tile materials and finishes require different types of sealants. It is essential you research and choose the appropriate sealant for your specific tile type. If you’re unsure, consult the manufacturer’s recommendations or seek professional advice on whether sealing is required for your chosen tiles. And if you want to know more, check out our complete guide to sealing tiles.
What to avoid when cleaning your tiles
The secret to keeping your tiles in spotless condition is steering clear of harsh chemicals and strong alkali or acidic cleaners. Avoid the likes of vinegar, bleach or any cleaning agent that sounds like it’s trying out for a superhero role (sorry Flash, not today). These aggressive solutions will harm the finish of your tiles and weaken the grout that holds them together.
As tempting as it may be, you should also refrain from using abrasive brushes, harsh scouring pads, steel wool or tools, as these can scratch or damage the surface of your tiles and the grout. Otherwise, your tiles won’t last very long, and they’ll start looking dull, sad and lacklustre (think of that neglected plant you haven’t watered for months).
While tiles are generally water-resistant, try to avoid (like the plague) excessive water pooling. Why’s that? Well, excess water can lead to mould growth, seep into grout lines and potentially cause damage or even tile detachment over time, which you definitely don’t want!
We’re sure you’ll want to take care of your investment, so your tiles can continue to shine and adorn your space with enduring beauty.
How to clean porcelain tiles
Porcelain tiles are known for their durability and low-maintenance nature, making them a popular choice for various areas in your home. While they won’t shatter like a dainty teacup, you’ll still want to treat them with the same level of consideration to ensure they remain a timeless and stunning part of your living space.
If you want to maintain the flawless look of your porcelain tiles, try these effective cleaning tips.
Regular sweeping or dusting
Before you begin cleaning, remove loose dirt, dust and debris from the surface of your tiles. Gently sweep the area using a soft-bristle broom or a dry microfibre mop.
For textured or matt-finish surfaces, you might need to be even more thorough to ensure dirt doesn’t accumulate in the textured crevices. A soft brush is a perfect option for these areas.
Preparing a cleaning solution
First things first, you’ll need to prepare a cleaning solution. You might be surprised to hear that most issues with porcelain tiles start with the incorrect type of cleaning product, so it’s vital to choose a compatible cleaning solution.
So, let’s start on the right footing to save your tiles from the perils of the wrong cleaning choices (gasp!). You should mix a mild detergent with warm water, opting for a pH-neutral or mild alkaline cleaner.
Before getting carried away and applying the solution to your whole floor, it’s best to test new products by adding them to a small area. For more intensive treatments, you might even want to test it on a hidden or spare tile.
Cleaning the tiles
Cleaning your tiled floors and walls will be relatively pain-free as once you’ve prepped your cleaning solution, you’ll be good to go!
For your floors, simply dip a soft mop into the solution and wring it out well. Mop the tiles, ensuring the mop is damp rather than soaking wet.
For your wall tiles, dampen a soft cloth or sponge with the cleaning solution and gently wipe down the surface. Focus on manageable sections to maintain control and coverage.
After cleaning your wall and floor tiles, rinse the surface thoroughly with clean water to remove any soap residue. This step is especially important to prevent a film from forming on the tiles over time. Then, dry the tiles with a clean and dry microfibre cloth or a towel to stop water marks and streaks from forming on the surface.
How to remove stains from porcelain tiles
You’ll be pleased to find that porcelain tiles are generally stain-resistant, but it’s good practice to clean up spills promptly to prevent potential staining or discolouration. Blot the spillage gently with a clean cloth and clean water.
But if a dreaded stain does appear, employing a delicate approach can work wonders. Follow these steps to effectively remove stubborn stains without compromising the integrity of your tiles:
Step One: Identify the stain type
Before attempting any stain removal method, identify the type of stain you’re dealing with. Different stains, such as oil, wine or ink, require specific treatments.
Step Two: Blot or scrape gently
When dealing with wet stains or spills, immediately blot the area with a clean, absorbent cloth to prevent it from spreading. For solid stains, gently scrape off any excess material using a plastic scraper or your fingernail through a cloth.
Step Three: Create a stain-removal paste
Mix a mild detergent with water to create a paste-like consistency. Mild detergents suitable for cleaning porcelain tiles include dish soap, gentle pH-neutral floor cleaners or specially formulated tile cleaners labelled as safe for porcelain surfaces.
Apply this paste to the stained area, covering it completely. Allow the paste to rest for about 15 to 20 minutes to loosen the stain. (Time to read a chapter of that book you haven’t touched for months)
Step Four: Gentle scrubbing
Use a soft bristle brush or an old toothbrush to scrub the stained area. Maintain a gentle touch to avoid scratching the surface. If the stain persists, add a bit of baking soda to the paste for extra scrubbing power.
Step Five: Rinse and wipe
After scrubbing, rinse the area with clean water to remove the cleaning paste. Wipe the tiles dry with a clean, soft cloth to prevent water marks.
Step Six: Repeat if necessary
If at first you don’t succeed, try and try again! For especially stubborn stains, you might need to repeat the stain-removal process a few times. However, avoid scrubbing too hard, as it may cause damage the tile surface. Stick to gentle agents to preserve its appearance.
Step Seven: Seek professional help
If all else fails and the unsightly stain persists despite your best efforts, or if you’re unsure about the appropriate treatment, consider seeking advice from a professional tile cleaner to prevent unintentional damage.
By treating stained porcelain tiles as delicate challenges, you can restore your tiles’ beauty without compromising their integrity. Remember, patience and a gentle touch are your allies in ensuring your porcelain tiles continue to shine like the day they were installed.
What is the best cleaning solution for ceramic tile floors?
The ideal cleaning solution for ceramic tile floors strikes a balance between effectiveness and gentleness. Consider these options:
Homemade mixture
If you’re feeling particularly nifty, mix a solution (magical concoction) of warm water and mild, pH-neutral detergent. The ratio may vary for different detergents, so make sure to check the bottle for recommendations. Don’t forget to avoid using harsh chemicals, as they can damage the ceramic glaze.
Commercial ceramic tile cleaners
Alternatively, you can use specialised ceramic tile cleaners. These often have balanced pH levels and are formulated to lift dirt without damaging the ceramic glaze. This option might be easier as the pre-made solution can be applied directly onto your tiles, straight from the bottle without you having to mix or prepare it.
How to clean ceramic tiles
Ceramic tiles bring a classic charm to your living spaces, and maintaining their brilliance requires a careful touch. Here’s our advice on effectively cleaning your ceramic tiles and preserving their aesthetic allure:
Regularly sweep or vacuum
Removing loose dirt, dust and debris using a soft-bristle broom or vacuum cleaner with a soft brush attachment will prevent abrasive particles from scratching your precious tiles during cleaning.
Clean the tiles
For your floor tiles, plunge your mop into the cleaning solution and squeeze it out well. Mop the ceramic tiles, focusing on small sections at a time. Rinse the mop frequently and change the cleaning solution if it becomes dirty.
For your wall tiles, you can simply use a sponge or soft cloth dampened with the cleaning solution. Carefully wipe down the surface, methodically working through manageable, small areas so you don’t become overwhelmed by the task.
After that, rinse the tiles with clean water to remove any soap residue, and wipe the tiles dry using a clean, soft cloth or a microfibre mop to prevent water spots.
How to clean glass tiles
Glass tiles create a captivating allure for your spaces with an enchanting reflection of light and colour. Caring for your glass tiles will require a gentle touch and the right approach. Let’s explore how you can keep them looking shiny:
Dusting and gently wiping
Begin by dusting the glass tiles to remove loose dirt and debris. Using a soft, lint-free cloth or microfibre duster, gently wipe the surface to maintain their gleaming appearance.
Crafting a mild cleaning solution
Mix warm water with a few drops of mild dish soap or gentle glass cleaner. Test the solution on a small, inconspicuous area before proceeding.
Delicately cleaning the tiles
Dampen a soft cloth or sponge in the cleaning solution and gently wipe down the tiles. Apply minimal pressure to prevent scratching.
Rinsing and drying
Rinse your tiles thoroughly with clean water to remove any soapy residue. Dry using a clean, lint-free cloth to prevent streaks and water marks, so your tiles look polished and as good as new.
Tackling stubborn stains
For persistent stains, create a paste with three parts baking soda and one part water. Apply the paste to the stained area, let it sit for a few minutes, and gently scrub using a soft brush or cloth. Rinse and dry the tiles afterwards.
Preventing hard water stains
To prevent the build-up of hard water stains, promptly wipe down your tiles after they come into contact with water. Regular maintenance will help preserve their clarity.
If your glass tiles are coloured or back-painted, use extra caution while cleaning. It’s safer for your tiles if you stick to non-abrasive cleaning agents.
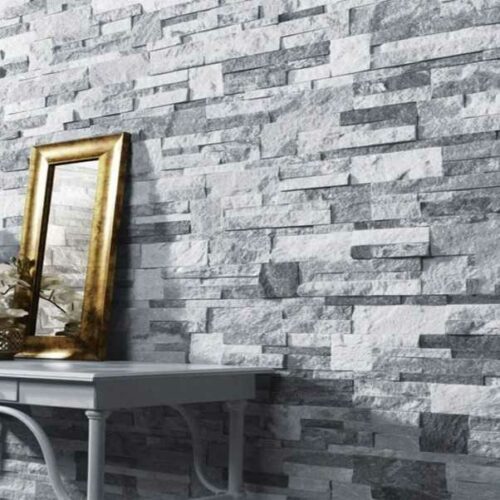
How to clean unglazed quarry tiles
Unglazed quarry tiles are a robust and distinctive flooring option that adds character to your spaces. Properly maintaining these tiles is essential to retain their rustic charm. Let’s delve into the steps to keep your natural stone tiles looking their best!
Regular sweeping and vacuuming
A great place to start is by removing loose dirt, debris and dust using a soft-bristle broom or a vacuum cleaner with a soft brush attachment. Frequent sweeping prevents particles from scratching tile surfaces and helps maintain their appearance.
Mild cleaning solution preparation
Mix warm water with a gentle pH-neutral floor cleaner. Typically, you’ll need one litre of water per capful of cleaner but always double-check the bottle to ensure you’re using the correct ratio. This concoction will help lift dirt without compromising the natural appearance of the tiles. To prevent erosion, it is important to keep well away from harsh chemicals and acidic cleaners.
Mopping with care
Moisten a mop with the cleaning solution and wring it out well to evade excessive moisture. Mop your tiles, working in small, manageable sections. Rinsing and wringing out the mop regularly will help prevent water pooling. Replacing the cleaning solution if it becomes cloudy ensures your tiles will stay looking and feeling spotless.
After mopping, rinse the tiles with clean water to remove any soapy residue. Dry the tiles with a clean, dry mop or a towel to prevent those pesky water marks.
Addressing stubborn stains
For tough stains, make a paste by mixing three parts baking soda and one part water. Apply the paste to the stain, let it sit for a while (make yourself a cup of tea), then gently scrub with a soft brush. Rinse thoroughly and dry the area.
Preventing wear and tear
Using rugs or mats in high-traffic areas will help to minimise wear on your precious tiles. Additionally, you may want to consider placing a mat near external doors to prevent debris from being tracked onto the tiles.
We’ve said it before, and we’ll say it again, steer clear of abrasive brushes, scouring pads and aggressive cleaning agents that can damage the porous surface of your tiles.
How to clean grout
Grout, while often overlooked, plays a pivotal role in the appearance and longevity of your tiled surface. Properly cleaning grout not only enhances the overall aesthetic but also ensures the integrity of your tiles.
Without grout, your tiles will be incomplete, lacking the structure and stability it provides. Neglecting your grout not only detracts from the visual harmony but also compromises the durability of your tiles. (Okay, you get it, it’s important… we won’t keep you any longer!) Here’s a step-by-step guide to grout cleaning techniques:
Step One: Prepare the area
Before you begin, clear the tiled area of any debris or loose dirt. This prevents dirt from spreading as you clean and helps you focus on the grout lines.
Step Two: Craft a grout cleaning solution
Mix equal parts of warm water and white vinegar to create a natural cleaning solution. For more stubborn stains, you can substitute hydrogen peroxide for vinegar.
Alternatively, you can use a commercial grout cleaner as per the manufacturer’s instructions, which might be less of a faff.
Step Three: Test in an inconspicuous area
Testing your chosen cleaning solution in a small, inconspicuous area will ensure it doesn’t cause discolouration or damage to your grout or tiles. There’s nothing worse than discovering you’ve unintentionally caused damage to a large area of your tiling. By detecting potential mishaps, you can confidently proceed with cleaning, knowing that your tiles and grout are in safe hands.
Step Four: Apply the solution
Use a soft-bristle brush, or an old toothbrush to apply the cleaning solution onto the grout lines. Allow the solution to sit for a few minutes but don’t let it dry on the grout. (Enough time to make another cup of tea)
Step Five: Scrub the grout
Gently scrub the grout lines using your brush of choice. (If you’ve gone for the toothbrush, we certainly wouldn’t recommend using it on your teeth afterwards!) Apply light pressure to avoid damaging the grout.
For particularly persistent stains, you can create a paste using three parts baking soda and one part water. Apply the paste to the stain, let it sit, then scrub.
Step Six: Rinse and dry
Rinse the area with clean water to remove any residual cleaning solution. Wipe the area dry with a clean, lint-free cloth or towel.
Optional Step Seven: Seal the grout
Once the grout is squeaky clean and dry, consider applying a grout sealer to protect it from future stains and dirt. Follow the sealer’s instructions and allow it to cure before using the area.
Regular maintenance is key to preventing grout build-up. Sweep or vacuum the area regularly and promptly clean up spills to inhibit stains. And it goes without saying, stay away from abrasive brushes or harsh scouring pads, as they can scratch and damage the grout. By dedicating time and effort to maintaining your grout, you can ensure your tiled surfaces remain beautiful and long-lasting.
Cleaning bathroom tiles
Bathroom tiles require meticulous cleaning to preserve their allure due to exposure to moisture, soap scum and residues. When cleaning your bathroom, mix warm water with a mild bathroom cleaner or a pH-neutral liquid soap. This solution effectively cuts through soap scum and residue while being gentle on the tiles.
Pay extra attention to your shower tiles, where soap scum and mineral deposits often accumulate. Regularly squeegee or wipe down your shower walls after each use to minimise build-up.
A great idea would be to incorporate a weekly or bi-weekly routine of wiping down surfaces and promptly addressing any stains. Consistent maintenance prevents the accumulation of grime and reduces the effort required for deep cleaning. So, it’s a win-win situation for you!
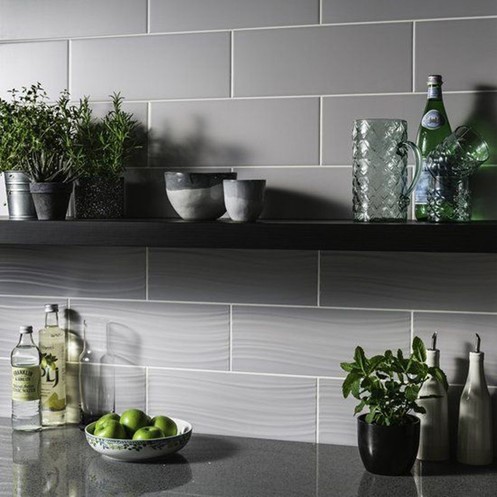
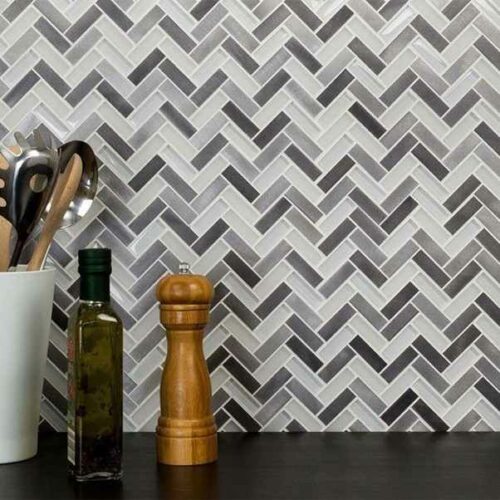
Cleaning kitchen tiles
Kitchen tiles require specialised care to maintain their beauty amidst the chaos of cooking splatters and spills. A cleaning solution of warm water mixed with a mild kitchen cleaner or a pH-neutral liquid soap will effectively remove grease and residue without harming the tiles.

Your backsplash will often face those dreaded splatters and grease. Frequently wiping it down after cooking will help to minimise build-up and make deep cleaning easier. Just like cleaning your bathroom, regular maintenance will help you keep on top of your housework routine and make your deep cleaning efforts more manageable.
Final thoughts
Your newly installed tiles will have transformed your living space into an appealing blend of beauty and function. But as life goes on, daily activities can challenge their pristine appearance. Thanks to this comprehensive tile aftercare guide, you can maintain their allure. Whether it’s sealing for longevity, proper cleaning techniques for different tile types, or tackling grout with finesse, you now possess the tools to ensure your tiles will stay looking shiny and like new. By following these practical steps, you can continue to enjoy the aesthetics and practicality your tiles bring to your home without the stress of wear and tear.

Was this guide useful?
Mentioned in this project guide:


